Tuesday, October 22, 2013

Apple Dumplings

Umm, YUM! I made these for the first time several years ago when we did our first Iron Chef party, which was apple-themed. The dough is an amazing combo between biscuit dough and pie dough that is truly delectable. SUPER rich, and not for the faint of heart.

2 cups water
1 1/2 cups sugar
1/4 tsp cinnamon
1/4 tsp nutmeg
8 drops red food coloring 
1/4 cup butter or margarine
2 cups all-purpose flour
2 tsp baking powder
1 tsp salt
3/4 cup shortening
1/2 cup milk
6 small whole apples, pared and cored

For syrup- mix first 5 ingredients; cook on medium high for 5 minutes, or until it comes to a slow boil. Remove from heat and add the butter. 

Sift together dry ingredients. Cut in shortening until mixture resembles coarse crumbs. Add milk all at once and stir just until the flour is moistened. On a lightly floured surface, roll in to a 18x12 inch rectangle.
Cut into six 6-inch squares. Place an apple on each. Sprinkle apples generously with additional sugar, cinnamon, nutmeg; dot with additional butter. Moisten edges of pastry, bring corners to the center and pinch edges together. Place 1 inch apart on a 9x13 baking pan. Pour syrup over the dumplings. Bake at 375 for 35-40 minutes. Serve warm with a dash of heavy cream over-top. 


I just made this for my Specials this past week, and got to try out the dough making feature of my food processor. It was awesome, and SO easy! It cut the flour and shortening together like a dream, and mixed everything just right. Will definitely be using that feature more! 

Saturday, August 3, 2013

Birthday Freebies!!


I LOOOOVE birthday week.  One of my favorite birthday memories was actually not on my birthday, but the hubby's. We went to Ichiban Japanese Steakhouse in Spring Arbor a couple of years ago with some friends on hubby's birthday - we were so excited to have a sushi place so close to home! So there we sat, eating our sushi and chatting...somehow the staff figured out it was Brean's birthday. So all of the sudden, out comes one of the staff with the most AMAZING sight...they had cut a a pineapple in half and made it look like a fish, complete with chocolate fudge and whip cream with a cherry for the eye. Not only was it the yummiest pineapple I ever had, but I couldn't believe how cool it was for them to do that! Such a great memory, and one of the reasons that we love Ichiban. (which is not on the following list because they are closed during the summer months)

 Last year, I found out that several restaurants give away free things on your birthday, and so my day of birth was spent tootling around the Jackson area getting free food. This year, I'm taking it a step farther and have spent a week researching what restaurants in the area give away free stuff and what you need to do to get it. I have compiled a slightly exhaustive list of restaurants in the Jackson/Spring Arbor area (and a few in Ann Arbor for kicks and giggles), and want to share it with you! For those not in the greater Jackson area, there are chain restaurants on the list that should be in your area. If you think of any that are missing, please let me know! I would love to add them! :)

The list is broken down into three categories: 1) Freebies that do not require any purchases, 2) Freebies or discounts WITH purchase of some sort, and 3) Restaurants that do not provide birthday deals at this time. They are organized within these categories, and then alphabetized, so just look for your favorite haunt! Without further ado....


Restaurant Freebie Purchase if necessary Action needed Date applicable


Freebies, no strings attached


BD's Mongolian BBQ (Ann Arbor) Free Stirfry No purchase necessary Member of Club Mongo, printed coupon Coupon good for 2 weeks


Big Boy Free hot fudge cake No purchase necessary Photo I.d, can get it to go Valid only on birthday


Biggby Free Coffee No purchase necessary Member of E-wards, coupon or drink on rewards card Valid only on birthday


City Crepes Free sweet Crepe No purchase necessary Photo I.d, Valid only on birthday


Cooper St Coffee Free Coffee No purchase necessary Photo I.d, Valid only on birthday


Culver's One scoop Sundae No purchase necessary Photo I.d. Valid only on birthday


Denny's Free Grand Slam No purchase necessary Photo I.d, Valid only on birthday


Dunkin Donuts Free Coffee/hot chocolate
Member of fan club, printed coupon


Fazoli's Free dessert No purchase necessary E-family member, coupon, printed or on mobile device


Jackson Coffee Company Free Coffee No purchase necessary Member of rewards program/or show I.d. Valid only on birthday


Lenny's Sub Shop Free sub No purchase necessary Signed up for Lenny's e-mails, printed coupon Valid only on birthday


Lone Star Steakhouse Free appetizer or free dessert No purchase necessary Member of E-club, printed coupon, carry-out ok Coupon good for 2 weeks


Maggie Moo's Free ice cream, kid's size No purchase necessary Fan club of Maggie Moo's, printed coupon Good until birthday


Outback Steakhouse Free dessert No purchase necessary Member of Tablemates, loaded on member account Good through the end of the month


Panera Free bakery item No purchase necessary Member of My Panera, freebie will be loaded on the card


Starbucks Free Coffee No purchase necessary Registered Starbuck's Card, loaded on the card Have 1 month to use it


Steak N Shake Free Double Steak meal No purchase necessary E-club member, print coupon


Deals WITH purchase


Anna's Gifts and Porch Cafe 5 Dollars off Any purchase at the gift shop Photo I.d., they'll give you a punch card Anytime during the birthday month


Applebee's Free dessert with entree purchase Photo I.d, Valid only on birthday


Arby's Free Shake With purchase Member of fan club, printed coupon Coupon good for 1 week


Bone Island Grill Birthday Drink With purchase up to 3 dollars Valid only on birthday


Chilangos Discount on entree With purchase Member of fan club, printed coupon Valid only on birthday


Coldstone Buy 1, get 1 free With purchase Member of fan club, printed coupon Coupon good for 1 week


Cracker Barrel Free dessert With purchase Photo I.d, Valid only on birthday


Finley's Free $8.49 @ lunch, 10.49 at dinner with purchase of entree Photo I.d, Valid only on birthday


Fortune Tommy's Ice Cream Shoppe Free ice cream With a group of 3 or more Photo I.d, Valid only on birthday


Hard Knock Grill Free dessert With purchase of any food Photo I.d, Valid only on birthday


Hugo's Bar and Grill Free Brownie Sundae Purchase of 1 entree Photo I.d, Valid only on birthday


Melting Pot (Ann Arbor) Free Chocolate Strawberries Valid with purchase of > $60 Fan club of the Melting Pot, printed coupon Coupon good for several months


Olive Garden Free dessert with purchase of entree Photo I.d, Valid only on birthday


Qdoba Buy 1, get 1 free entree With purchase Member of rewards program, printed coupon Coupon good for ~1 week


Red Lobster $5 off two entrees Purchase of 2 entrees Member of Fresh Catch, printed coupon Good until date stated


Slice of Spice Free dessert With purchase Photo I.d, Valid only on birthday


Steaks Eatery Birthday Cake and Ice cream With purchase Photo I.d, Valid only on birthday


No Deals


AKA Sushi No deals


Blue Moon Cafe No deals


Bob Evans No deals


Buffalo Barbeque Wings No deals


Burger King No deals


Cafe Lilla No deals


Crazy Cowboy No deals


Cuppa No deals


European Bakery No deals


Grand River Marketplace No deals


Hinkley's Bakery No deals


House of Tacos No deals


Hungry Howie's No deals


International Dog House No deals


KFC No deals


Klavon's No deals


Lucky's Chinese No deals


Marino's Pizza No deals


McDonalds No deals


Old Country Buffet No deals


Papa John's No deals


Pickle Barrel Deli No deals


Pizza Hut No deals


Schlenker's Sandwich shop No deals


Steve's Ranch No deals


Subway No deals


Taco Bell No deals


The Hunt Club No deals


The Parlour No deals


Tim Horton's No deals


Wendy's No deals


Enjoying birthday Freebies 2012


New Orleans Corn Bisque with Smoked Sausage

So this soup turned out SUPER yummy...NOT however enough for the proposed 8 servings, and pretty high on the calorie count for frequent consumption. I would say it makes closer to 4 -6 servings. The hubby actually made this one and he's very good at following recipes as directed, so there aren't any changes made this time. My future changes are below. :)

Ingredients
Original recipe makes 8 1-cup servings

 1 (16 ounce) package Hillshire Farm® Smoked Sausage
 1 medium onion, chopped
 1/4 cup butter or margarine
 1/4 cup all-purpose flour
 1/2 teaspoon salt
 1/8 teaspoon ground black pepper
 1 (15.25 ounce) can whole kernel corn, drained
 4 cups milk
 2 cups cubed potatoes, cooked, drained
 Chopped parsley (optional)
 Shredded Cheddar cheese (optional)

Directions

1) Cut sausage into 1/2 inch cubes.
2) Melt butter in large saucepan over medium heat. Add onion; cook and stir until tender. Add flour, salt and pepper; cook, stirring constantly for 1 minute.
3) Add milk. Increase heat to medium-high and bring to a boil, stirring constantly. Boil and stir 1 minute. Add corn and sausage; return to a boil.
4) Reduce heat to medium-low and simmer 10 minutes. Stir in potatoes; heat through.
5) Top each serving with parsley and cheese, if desired.


So, for me, the potatoes kind of over-powered the soup. I'm not sure if that's because they were in pretty large chunks, or whether it seemed like there were too many chunks compared to the amount of soup. In order to make enough for 8 people, I think I would add some chicken broth- maybe a cup or two. And possibly another 1/2 can of corn - but I really love corn, so that could be a contributing factor. ;) In order to make it more of a bisque, once I added everything but the sausage, I would blend it until mostly smooth, then add the sausage at the end. We did not add the cheese or parsley, and I think it was excellent without it.

Hubby and I just returned from my most FAVORITE ice cream treatery....Maggie Moo's! If you are in the Jackson, MI area, I highly recommend it. Speaking of which...it's BIRTHDAY week! So as an extra treat for you, I am going to share my project that I have been working on today. I have compiled a list of all the freebies (mostly food related) available in the Jackson/Spring Arbor area that one can get on their birthday! But I'm making it it's own post...so go check it out! :)

Sunday, July 21, 2013

Paella

This is a family standby at our house, though I realized when I was making it this weekend that I don't think I had made it since moving in to our house, which was over 2 years ago! Man, time flies when you're having fun! There are tons of different versions of Paella - it is a traditional Valencian dish, which is located in Spain. It is comprised of seafood, rice, green vegetables, and spices (and apparently beans, according to Wikipedia), the main seasonings being curry, saffron, and some type of spicy sausage. I'll be honest, I've never made it with saffron, just because I don't have any on hand! This recipe is the one passed down to us from the hubby's parents, and to them by his grandma, which is kind of cool. We've adapted it from there, but in the spirit of keeping the family recipe alive, I will post it as written and share my changes below.

Paella

      Ingredients
12 small fresh clams, 12 medium size shrimp in shells, mussels, squid, octopus, scallops, or any other shell fish
8 oz chorizo or pepperoni, sliced
2 Tbs. cooking oil
Chicken pieces (8 portions)
30 oz. chicken broth (about 4 cups)
1 medium sized onion, cut into wedges
1 sweet red or green pepper, cut into strips
1 tsp minced garlic
2 cups white rice, uncooked
1/2 tsp oregano
1/4 tsp saffron (if you have it)
2 tsp curry powder
5 oz. package of frozen green peas

     Directions

  1. Clean and shell shrimp
  2. Cook sliced chorizo, pepperoni or sausage in skillet for 10 minutes, drain fat, and set aside to cool. 
  3. Heat oil in skillet and brown the chicken pieces for about 15 minutes, turning occasionally. Remove chicken and set aside.
  4. In a sauce pan, heat chicken broth to a boil. Meanwhile, brown onion, pepper, and garlic in the oil remaining in the skillet used for the chicken. Pre-heat oven to 400 degrees, and set the bottom shelf to the lowest setting.
  5. Add rice and seasonings to the boiling broth. Bring to a boil over high heat and then remove from heat. 
  6. Pour rice into Paella or Pyrex pan (use at least a 9 x 13)
  7. Arrange chicken, sausage, and shrimp/shell fish on top of the rice. Scatter peas over it all. Set pan on the bottom shelf of the oven and bake uncovered for 25-30 minutes, or until rice is done. NEVER STIR!
  8. When done, remove and cover with a kitchen towel for ~5 minutes, then serve. 

Alright...so from the get-go, I hate peppers. Of any sort. So I don't put those in, ever. For seafood, I use 1 pound of the pre-cooked shrimp and no other shellfish - I've used any size from salad shrimp to jumbo shrimp, whatever your preference is should work. For sausage I use pepperoni cut into chunks (not sliced) and increase the amount from 8 oz to 16 oz. And for the peas, I usually use around 8-10 ounces, because I like peas. And it helps break the spiciness of the dish a little bit. I usually use chicken tenders for my chicken and cook however many will fit on the top of the 9 x 13 pan (usually 6-8). Instead of draining the pepperoni after cooking and using separate cooking oil, I brown the chicken in the skillet I used to cook the pepperoni. It gets an awesome flavor from the leftover pepperoni oil, and browns pretty well. 
As for changes in the cooking process, we have found that the rice is NEVER done in the 30 minutes allotted to it in the oven. Usually it takes 45-60 minutes if followed as directed. So to combat this, we combine everything except for the shrimp, peas, and chicken in the chicken broth and boil it for ~10 minutes. Then stir the shrimp and peas into the pot and immediately put into your Pyrex pan. Place the chicken pieces on top and cook for the specified 25-30 minutes. We have found that this keeps the peas from getting mushy and the shrimp from getting overcooked and chewy. This is a hearty dish, which just the right amount of spice to keep it interesting without being too spicy for me! 
I would love to hear if you have made paella before, or what changes you would make! 


Listening to The Piano Guys currently, and getting ready to watch Perception's first episode of season 2. Happy Sunday night to me. :) 


Loaded Pretzel Cookies

Branching out from my usual Allrecipes, this fantastic find was in one of this past year's Taste of Home! Super yummy, and while it has coconut, you can't really taste it...I had a coconut-hater eat them today and LOVED them. :D Win! I recommend not measuring the chocolate chips...you can't have too many.


1 cup butter, softened
1 cup sugar
1 packed cup brown sugar
2 eggs
2 tsp vanilla
2 1/2 cup flour
1 tsp baking powder
1 tsp baking soda
1 tsp salt
2 cups mini pretzels, crushed
1 1/2 cup coconut
1 1/2 cup M&M's

        Directions

1) Preheat oven to 350. Cream butter and sugars together until light and fluffy. Beat in eggs and vanilla.

2) In a separate bowl, sift flour, baking soda, baking powder and salt together. Then slowly beat in to the wet mixture until mixed.

3) Add rest of ingredients and stir until mixed. Using about 1/4 cup per cookie, roll into a ball and put on an un-greased cookie sheet, about 3 inches apart. Bake for 12-14 minutes.

Loaded-Up Pretzel Cookies Recipe

As typical with baking, the only thing I changed was to add more M&M's...minus the ones that I had previously eaten out of the bag, I think it only added another 1/8th cup. ;) I used a cookie scooper, which I think made it a little less than 1/4 cup per cookie, and I got 36 cookies out of the dough, as opposed to the 24 that they told me I would get. These seemed to be a big hit with kids and adults - the salty/sweet mixture was a nice change from regular chocolate cookies without getting TOO far away from tradition. You really can't taste the coconut much - you could probably leave it out, but I think it adds a bit of moistness, and also some bulk. All in all, a keeper for this household!

Sunday, June 30, 2013

Hudson's Baked Tilapia with Dill Sauce

Ok, continuing the lemon theme of this month, but branching out from desserts (there are more to come, I promise) - fish! With lemon! And dill! What could be better?? (the hubby disagrees on the fish part, but he's rather silly, so we shall ignore him this time)


      Ingredients
Makes 4 servings
 4 (4 ounce) fillets tilapia
 salt and pepper to taste
 1 tablespoon Cajun seasoning, or to taste
 1 lemon, thinly sliced
        Sauce
 1/4 cup mayonnaise
 1/2 cup sour cream
 1/8 teaspoon garlic powder
 1 teaspoon fresh lemon juice
 2 tablespoons chopped fresh dill

     Directions

1) Preheat the oven to 350 degrees F (175 degrees C). Lightly grease a 9x13 inch baking dish.

2) Season the tilapia fillets with salt, pepper and Cajun seasoning on both sides. Arrange the seasoned fillets in a single layer in the baking dish. Place a layer of lemon slices over the fish fillets. I usually use about 2 slices on each piece so that it covers most of the surface of the fish.

3) Bake uncovered for 15 to 20 minutes in the preheated oven, or until fish flakes easily with a fork.

4) While the fish is baking, mix together the mayonnaise, sour cream, garlic powder, lemon juice and dill in a small bowl. Serve with tilapia.


   I love fish, and the hubby does not, so I'm always looking for new fish recipes for "fend-for-yourself-night", which are at least a bi-weekly occurrence in our household. Plus, anything with dill is always a good option. Add sour cream...even better! Now, on to changes. :D 
   I don't have Cajun seasoning, so I used the Grill Mates Mojito Lime Marinade rubbed on half of the fish filets, and a mixture of seasoning salt, pepper, and garlic salt for the other half. I really liked that combination of flavors with the lemon and dill sauce. I tend to bake my fish a little bit longer than directed, about 25ish minutes for this recipe...I have this phobia of uncooked fish, so I tend on the over-cooked side. These were still moist, so I consider it a success. 
    Made the sauce as directed, with a extra couple dashes of dill (because really, can you have too much dill??), and added a bit less mayo than called for. It was soooooo good! I had more sauce than needed for 1 pound of fish, and I was trying to figure out what else I could use it on! No luck on that, by the way. I served it with roasted asparagus...yum yum! 

Lemon Cheesecake Squares

You are about to be inundated with lemon recipes. ;) The papa-in-law LOVES lemon desserts, and as June host the holiday known as Father's Day, lemon abounds in the Hunt household at this time of year. These are DEFINITELY a keeper recipe, and are great for a large group of people.


        Ingredients
Makes ~20 servings

 3/4 cup shortening
 1/3 cup packed brown sugar
 1 1/4 cups all-purpose flour
 1 cup rolled oats
 1/4 teaspoon salt
 1/2 cup seedless raspberry jam
FILLING:
 4 (8 ounce) packages cream cheese, softened
 1 1/2 cups sugar
 1/4 cup all-purpose flour
 4 eggs
 1/3 cup lemon juice
 4 teaspoons grated lemon peel

      Directions

1) In a mixing bowl, cream shortening and brown sugar. Combine the flour, oats and salt; gradually add to creamed mixture. Press dough into a greased 13-in. x 9-in. x 2-in. baking dish. bake at 350 degrees F for 15-18 minutes or until golden brown. Spread with jam.

2) For filling, beat the cream cheese, sugar and flour until fluffy. Add the eggs, lemon juice and peel just until blended. Carefully spoon over jam. Bake at 350 degrees F for 30-35 minutes or until center is almost set.

3) Cool on a wire rack. Cover and store in the refrigerator.


   I'll be honest...baking is not my strong suit. I much prefer cooking, so when it comes to baking, I stick pretty close to the recipe, afraid that any changes I make will cause it not set, or rise, or whatever it's supposed to do. ;) So for realsies, this is a "follow as directed". (ok, except for I did add a dash of lemon extract to the cheesecake part, as it need a smidge more lemon.)  I used 3 lemons for the juice and zest, and that seemed about right when I measured it out. 
    The raspberry provides a nice foil, keeping the cheesecake part from being too lemony, and the crust isn't overly sweet, providing a nice clean balance. I recommend using a knife run under hot water (frequently!) when cutting the bars to avoid the cheesecake clumping on the knife. A resounding yes from this household, and hopefully from yours too. 

Cheesy Leek and Mustard Soup

Happy Dr. Who day! This month's theme is French Bistro, and since panini's and frittes were already covered, what was left for me but my favorite...soup! Searched my recipe box, and this was the closest soup I could find that seemed like it would be served in a bistro. Plus, I got to use up most of the leeks I had frozen after making Colcannon. Bonus!


        Ingredients
Makes 4 to 6 servings
 1 1/2 pounds leeks, sliced
 1 onion, chopped
 1 potato, cubed
 1 carrot, chopped
 1 tablespoon butter
 1 tablespoon olive oil
 1 1/4 teaspoons dry mustard powder
 2 teaspoons cornstarch
 1/2 cup water
 salt and pepper to taste
 1 teaspoon white sugar
 5 cups water
 1 cube vegetable bouillon
 1 cup heavy whipping cream
 1/8 cup shredded Gruyere cheese
 1/4 cup shredded Cheddar cheese

          Directions

1) In a large pot over medium heat, saute the leeks, onion, potato and carrot in the butter or margarine and the olive oil for 10 minutes, or until all vegetables are tender.

2) Mix the mustard powder and cornstarch with the 1/2 cup water to make a thin paste. Set aside.

3) Season the vegetable mixture with salt and pepper and sugar. Stir in the mustard-water mixture and the 5 cups water. Bring mixture to a boil. Stir in the bouillon cube, reduce heat and simmer for about one hour, until reduced by half.

4) Using a hand blender or upright blender, puree mixture until frothy but not completely smooth.

5) Return this to the pot and bring to a boil. Stir in the heavy cream, Gruyere and Cheddar cheeses. Heat until cheeses melt, do not boil. Serve hot.


    Ok, so much yum happening in this recipe! I used about 1 and 1/2 cup of chopped leeks - more of a guesstimate than actual measuring. I used two medium potatoes (peeled and chopped) and 3 small carrots, as I wasn't sure how big the potato and carrot was supposed to be! I think that ratio worked out just fine, though I did add an extra dash of olive oil, just in case. Sauteed all the veggies for about 15 minutes, then added the seasonings and liquid. Instead of a vegetable bullion cube, I used my chicken stock bullion mix. Simmered for the hour, and then blended. Just an FYI - blending hot liquid makes the top spit at you when you start it! It blended really well, coming out to a nice mustardy color. Added the cream and about 1/2 cup of Gruyere cheese and 1/2 cup Sharp Cheddar. I love cheese, so the more the better! I don't think my simmering reduced the soup by half, so it helped thicken it up just a smidge more. Served with a hearty slice of French bread, and it's a meal fit for a king.
     This soup has a great flavor, and the leeks are not too over-powering. I could have added more mustard with no ill effects, and I did have to add some additional salt at the end. It's hard to add seasonings "to taste" when you're only half way through the recipe!

Sunday, June 2, 2013

Southwestern Shrimp Bisque

This recipe is Taste of Home magazine, the 2012 April/May issue. After trying it once, it has become a fast favorite at my house, and even makes great leftovers...if there are any, that is. :) I highly recommend doubling the recipe from the get-go. It says that one recipe makes 3 servings, but unless you're referring to the world's smallest bowl of soup, I say double it, and you'll get 3-4 bowls worth.


Southwestern Shrimp Bisque

      Ingredients

1 small onion, diced
1 Tbsp olive oil
2 cloves garlic, minced
1 Tbsp all-purpose flour
1 cup water
1/2 cup heavy whipping cream
2 tsp chicken bullion granules
1 Tbsp chili powder
1/2 tsp ground cumin
1/2 ground coriander
1/2 pound medium shrimp, peeled and deveined  (you can use cooked or uncooked) 
1/2 cup sour cream
Chopped fresh cilantro and sliced avocado, option

       Directions
1. In a small saucepan, saute onion in oil until tender. Add garlic; cook 1 minute longer. Stir in flour until blended. Stir in water, cream, bullion and seasonings, bring to a boil. Reduce heat; cover and simmer for 5 minutes. 
2. Cut shrimp into bite-sized pieces if desired. Add shrimp to soup. Simmer 5-10 minutes until shrimp is pink. (if you are using cooked shrimp, cook just until the shrimp is warm.) Place sour cream in a small bowl; gradually stir in 1/2 cup of hot soup. Return mixture to the pan, stirring constantly. Heat through (do not boil). If desired, top with cilantro and/or avocado. 


Follow as directed! I haven't used uncooked shrimp, just the frozen pre-cooked ones, so I usually just add the shrimp at the same time as the sour cream mixture. I haven't had any issues with them getting rubbery. Excellent served with crisp green salad and crusty french bread for dipping! 

Mexican Shrimp Bisque Recipe

Monday, May 27, 2013

Curried Cashew, Pear, and Grape Salad

Summer is not only time for grilled food, but for fresh salads! This one I made for our latest Dr. Who night, and I think it was pretty tasty. I may play around with the cashew seasoning next time, other than that, it was a fun and different salad take.

         Ingredients

 3/4 cup cashew halves
 4 slices bacon, coarsely chopped
 1 tablespoon melted butter
 1 teaspoon chopped fresh rosemary
 1 teaspoon curry powder
 1 tablespoon brown sugar
 1/2 teaspoon kosher salt
 1/2 teaspoon cayenne pepper

Dressing:
 3 tablespoons white wine vinegar
 3 tablespoons Dijon mustard
 2 tablespoons honey
 1/2 cup olive oil
 salt and black pepper to taste

Salad:
 1 (10 ounce) package mixed salad greens
 1/2 medium Bosc pear, thinly sliced
 1/2 cup halved seedless red grapes

         Directions

In a large, dry skillet over medium-high heat, toast cashews until golden brown, about 5 minutes. Remove cashews to a dish to cool slightly.
Return skillet to medium-high heat, cook bacon strips until crisp on both sides, about 7 minutes. Remove bacon with a slotted spoon, and soak up grease with a paper towel. Coarsely chop bacon, and set aside.
In a medium bowl, stir together butter, rosemary, curry powder, brown sugar, salt, cayenne pepper, and toasted cashews. Set aside.
In a small bowl, stir together white wine vinegar, mustard, and honey. Slowly whisk in olive oil, and sprinkle with salt and pepper to taste.
In a large salad bowl, toss dressing with greens, pear slices, grapes, and bacon, and sprinkle with nut mixture.


I did double the recipe, because really, what was I going to do with 1/2 of a pear? Based on multiple reviews, my first change was to roast the cashews in the oven. I started the bacon by baking it on a baking sheet in a non-pre-heated oven on 450 for about 15-20 minutes. I added the cashews once the oven was heated and cooked for about 10 minutes. The cashews got a little toasty on the bottom, so I think I'd decrease the time to 8 minutes. I do not overly love spicy food, so I decreased the cayenne pepper to just a sprinkle. 
 Also based on reviews, I decreased the oil in the dressing by a little more than half (I used 7 Tblspns instead of 1 cup of olive oil). That seemed to be the perfect amount - it was an awesome tasting dressing, and not too oily. I left the dressing to be put on to taste - it's pretty strong, and I think it would wayyyyyyy overpower the salad if made in the specified proportions. My only addition to the recipe was to add some blue cheese (on the side, for any non-blue cheese lovers), which I think was quite yummy. 

So now, with that all said, it's back to my Gilmore Girls marathon. On season 2, and Rory just broke her wrist....Oh calamity! 

Tuesday, May 21, 2013

Roasted Chicken, Potatoes, and Veggies

It is summer, and I'm a firm believer that summer food is grilled food! Seriously, could live on anything grilled. So I started some chicken breasts marinating, with the purpose of grilling last night. Then realized that we were out of charcoal, and I wasn't going shopping until AFTER dinner. Well then. So what did I do with my yummy marinated chicken, you may ask? Created a masterpiece! :D This is a versatile creation, so play around with the seasonings and have fun!

        Ingredients
Makes 8 servings

4 chicken breasts, marinated in GrillMates Mexican Fiesta Marinade made as directed
~2 pounds of potatoes, cut into small chunks
Asparagus (I used a steamer box that was 8 oz...would increase next time!)
~3 Tblspn Olive Oil
1/2 cup butter, melted
Garlic powder, seasoning salt, pepper, and poultry seasoning to taste


        Directions
Preheat oven to 425. Once everything is cut into small pieces (chicken, potatoes, and veggies), drizzle in olive oil, pour over the remaining marinade from the chicken, add seasonings, and mix until evenly coated. Divide into 2 9x13 baking pans, and drizzle with melted butter. (I think it would be fine to leave this step out - the olive oil does a good job, but it did make it extra tasty!)  Bake both pans on the top rack of the oven for 30 minutes, then stir. Bake for another 30 minutes, or until potatoes are cooked and getting lightly brown. Serve, and enjoy!

My only addition/future change to this would be to add green beans as an additional veggie. I added some today when I reheated leftovers, and it was delectable! It just added that little extra something. I'd also like to try it mixing sweet potatoes in the mix, or maybe some acorn squash. The possibilities are endless! I definitely recommend marinating the chicken prior to roasting - the flavor was incredible, and I think without it, the chicken would be a bit bland.

Tuesday, May 14, 2013

Easy Chicken Taquito or Quesadillas

So I started this by following a recipe on Allrecipes...then I deviated so far from the recipe that it really wasn't even the original recipe anymore. Hence, a sort of original! :)

Ingredients
This made 8 corn tortillas, and 3 quesodillas

4 chicken breasts
Chicken broth
1 can Cream of chicken (mine had herbs in it, but you can use the original)
1 cup Monterrey Cheese, shredded
Taco seasoning to taste
Garlic salt to taste
Corn Tortillas
Butter to brush on the tops of the tortillas

Directions

1) Preheat oven to 400. Poach the chicken breasts by putting enough broth (or you can use just water) in a sauce pan just enough to almost cover the chicken breasts. Bring to a boil, then cover and reduce heat to medium. Cook for 15 minutes, or until chicken breasts are fully cooked.

2) Shred the cooked chicken, pulling out any fat or gristle. The adding of the following ingredients is very subjective...use what you want! I added ~3/4 can of Cream of Chicken with herbs, 3 Tblspoons of taco seasoning, a sprinkle of garlic seasoning, and about 1 cup of shredded Monterrey cheese. Stir until fully mixed.

3) Put 2ish Tblspns of chicken mixture on a corn tortilla. Roll and place seam down in an 9x13 baking pan or baking sheet. Brush the tops with a small amount of butter. Bake in the pre-heated oven on the top rack for 20-30 minutes, or until the tops are slightly brown. Can be served with additional toppings such as sour cream, salsa, queso dip, green onions, etc.

Optional - if you want to make quesodillas, use large flour tortillas instead of corn tortillas. Heat a skillet over medium-high heat. Place several tablespoons of chicken mixture onto the tortilla and fold in half. Brush both sides with a small amount of butter and heat until brown, flipping once. Depending on your skillet, this takes anywhere from 1-3 minutes.

I think this will be a good and easy dinner that can be changed around to whatever mood I'm feeling like that day! The only addition I would have made to this batch was to add a little bit of hot sauce to the chicken mixture, adding a little extra kick. And maybe some extra cumin. And or onion powder. Oh, the places you can go! :)


      I had this situation earlier this week, and want to get some feedback from the internet world. What do you do when someone you have, or will be having, a professional relationship with, starts bad-mouthing one of their competitors? For me, it's a very frustrating moment. I don't need to hear about their competition - I would hope that their work can stand for itself, without putting others down.
     So what does one do? I have handled it both ways - I have ignored it and just let them talk, and I have interrupted them and asked them to get back to talking about whatever it was that pertains to their company. I don't want to be rude, or inconsiderate, but I do feel like if no one ever addresses it, the situation is never going to get better. It is never acceptable to go in to how your company is so much better than a specific other company. Be proud of what you do, and your company, but do it in a way that doesn't bring other companies in, or even say "this is something we do that a lot of other companies don't do".
     Thoughts? Is there a way to challenge this kind of sales pitch/marketing behavior without being considered a jerk? And if it happens, should it be addressed in your first meeting with the person, or later if it comes up again?

Saturday, May 4, 2013

Kentucky Hot Browns/Bocci Ball

Happy Derby Day!!! The Kentucky Derby is quite the event at my household. I've been following/watching the iconic race since I was at least 14, and while in later years I haven't been as zealous at following the pre-race horse history, the actual race is always something to be excited about. We pick our favorites, cheer loudly, and crow proudly if we correctly guess any of the top three placers. (I would like to boast at this point that I did in fact pick the winner this year - Orb) This year we cranked up Derby fever a bit and added classic Derby food to the day! It was quite yummy, so I am going to share it with you. Enjoy! (Recipe copyrights go to Shine on Yahoo)

Ingredients
4 thick white bread slices 3/4 pound sliced roasted turkey 
Mornay Sauce (see below)
1 cup (4-oz.) shredded Parmesan cheese 
3 plum tomatoes, sliced 
8 bacon slices, cooked 

Preparation: 
1. Preheat broiler with oven rack 6 inches from heat. Place bread slices on a baking sheet and broil 1 to 2 minutes on each side or until toasted. 

2. Arrange bread slices in 4 lightly greased broiler-safe individual baking dishes. Top bread with turkey slices. Pour hot Mornay Sauce over turkey. Sprinkle with Parmesan cheese. 

3. Broil 6 inches from heat 3 to 4 minutes or until bubbly and lightly browned; remove from oven. Top sandwiches with tomatoes and bacon. Serve immediately. 

Mornay Sauce 
1/2 cup butter 
1/3 cup all-purpose flour 
3 1/2 cups milk 
1/2 cup (2-oz.) shredded Parmesan cheese 
1/4 teaspoon salt 
1/4 teaspoon pepper 

Preparation: 
Melt butter in a 3-qt. saucepan over medium-high heat. Whisk in flour; cook, whisking constantly, 1 minute. Gradually whisk in milk. Bring to a boil, and cook, whisking constantly, 1 to 2 minutes or until thickened. Whisk in Parmesan cheese, salt, and pepper. 


      Follow as directed (pretty much ;p). I used Garlic Texas Toast for the bread, and shredded block Parmesan in the food processor. I did bake the bacon prior to starting the recipe - I feel like once you get started with the sauce, you're stirring until you put everything together! As a result, the bacon wasn't piping hot, so instead of adding it right before serving, I put it on top of the bread/turkey/Mornay sauce/Parmesan combo before putting it back in the oven to broil for the 3-4 minutes. This was perfect, as it browned the bacon just a bit more, and didn't interfere with the browning of the Parmesan. I used 1 piece of bacon, and 1 and 1/2 thick cut slices of turkey breast per sandwich, which was a great ration of meat to bread.
       The sauce is a little bland...I think next time I would spice it up with some sort of seasoning +/- extra salt. There is also a TON of sauce made with this recipe! I typically like things really saucy, and even making 6 sandwiches, I still have over half the pot of sauce left! Definitely recommend halving the sauce portion of the recipe, or devising something else you could use it for!  And while in traditional Derby fashion, this should be served with a Mint Julep...I just don't like them! I'm not a big fan of drinks with mint in them. So we opted to serve a Hunt classic - The Bocci Ball! 
     The Bocci Ball is pretty simple - mix orange juice, club soda, and amaretto together (as much of each as desired, and served cold - typically it's 1 cup orange juice, 1/3-1/2 cup club soda, and 1 shot amaretto) with a splash of lime juice. Stir well and enjoy!

Wednesday, May 1, 2013

Colcannon

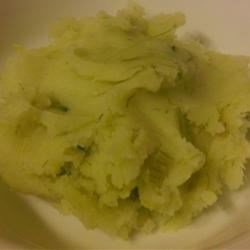
So this is an interesting, and potentially healthier version of mashed potatoes? This is a recipe where my food processor (Merry Christmas to myself!) came in super handy! I think I would try it again, with a couple of minor changes. (see below) Being of Irish orgin, it would be the perfect accompaniment to your next St. Patty's Day meal!

         Ingredients

Original recipe makes 4 to 6 servings

 1 pound cabbage
 1 pound potatoes
 2 leeks
 1 cup milk
 salt and pepper to taste
 1 pinch ground mace (or you can use ground nutmeg)
 1/2 cup butter

          Directions

In a large saucepan, boil cabbage until tender; remove and chop or blend well. Set aside and keep warm. Boil potatoes until tender. Remove from heat and drain.
Chop leeks, green parts as well as white, and simmer them in just enough milk to cover, until they are soft.
Season and mash potatoes well. Stir in cooked leeks and milk. Blend in the kale or cabbage and heat until the whole is a pale green fluff. Make a well in the center and pour in the melted butter. Mix well.


      This recipe took more research than most! I chopped up my two leeks, and was thinking to myself, "this is a TON of leeks!" It looked equal to the amount of both cabbage AND potatoes! I then googled "how big is an average leek?" (my leeks were probably a little over 1 foot long and 3-4 inches wide) Google informs me that "average leeks" are 2-3 inches long, and 1-2 inches wide. Ummm, yah, thinking I have an over-abundance of leeks at this point! ;) I used 1/4 of my chopped leeks, and I think I may decrease it a little bit more next time.
      My second point of research came when it was time to boil the cabbage. I have never boiled cabbage before! How long does one boil cabbage "until tender"??? Back to good ol' Google...apparently if the cabbage is in wedges, about 10 minutes. (if it's already chopped, boil for 3-5 minutes) And I'll just throw in, if you've never boiled potatoes, it takes about 15 minutes if they're in chunks.
    Ok, continuing on. I used 1 head of cabbage (because I'm not 100% sure how much of 1 cabbage is a pound, and didn't have any plans for leftover cabbage), 6 medium sized potatoes (again, over a pound, but it looked to be about the right ratio to match the cabbage), and about 1/2 of ONE leek. Used the food processor to mash the potatoes and cabbage, and once the leeks had finished in the milk, stirred them all together with the butter, salt, and pepper in a large bowl. I really liked how the food processor blended the cabbage. I think it made the potatoes a little TOO smooth for my taste - I like a little more texture in my potatoes. I simmered the leeks in 1 cup of milk for about 7 minutes - I would increase that time by a couple of minutes. The leeks seemed mostly cooked, but a little stringy compared to everything else that was very well blended. I did forgot to add the nutmeg (which is a substitute for mace, if you are wondering what else you could use), which would have been an interesting counterpart to the rest of the ingredients.
    My mixture turned out pretty soupy, so I put it in a 9x13 and baked it uncovered for about 30 minutes on 350 degrees, which gave it a tinge of brown on top and sucked up some of the extra liquid. I may decrease the milk, or squeeze the excess water out of the cabbage with a cheesecloth or something. All the flavors came together pretty well - you could taste the cabbage, potatoes, and leeks individually, but they complimented each other too. The leeks were a little more over-powering than I would have wished, but with using 1/3 of a leek next time, I think it would be perfect. Salt and pepper to taste. A keeper recipe, but probably won't make it into the frequent rotation.


Do you ever have that day when the stars align, and you feel extra-loved by all those people in your life? Last night was one of those for me. :) I was held up at work, and was supposed to make these lady bug crackers for my Special group that night, so I called the hubby and asked if he could start them for me. Not only did he search and find the exact recipe I was referring to, but he made them all, and had them packed and ready for me to grab when I came skidding home about an hour later than expected. And because I was running late, he foresaw I would not have time to eat the soup he made for dinner, so he made me a delicious sandwich! (He used garden vegetable cream cheese, red head lettuce, monterrey cheese, and clementines, things I never would have combined, but it was AMAZING!!) Had the evening stopped there, it would have been perfect, yet it gets even better!
   I got to meet with my special group (yes, that is our name), which basically consists of us getting together, eating amazing food, and talking books and life, and laughing, laughing, laughing. Last nights menu consisted of lady bug crackers, strawberries, gouda cheese, asparagus, dark chocolate balsamic vinegar, homemade sugar/cinnamon pecans, and orange/vanilla monkey bread. I challenge you to find a better combination of food anywhere on the planet!
     With a full heart, I came home, and found a facebook post from my boss, just saying how much she appreciated me that evening. Kind of the cherry on top of an already perfect sundae! I felt so loved and blessed by everyone, it was definitely a heart-happy evening. And these are the things I need to remember when I'm frustrated, or having a grumpy day. Hence immortilazation in blog form. ;) In whatever form that means for you, I hope you have a heart-happy moment this week.

Sunday, April 21, 2013

Chicken Gnocchi Soup

I thought I had posted this recipe, but apparently not. It's quickly become an old standby at our house, meaning I didn't think it was a new one anymore! ;) The hubby LOVES chicken noodle soup, and while I don't mind it, this soup is a similar enough to make him happy, and different enough to make me happy. Winner all around! It's a pretty versatile soup, you can change whatever you want (pretty much) and it comes out awesome.

Chicken Gnocchi Soup
Ingredients
Makes about 6 servings

 1 tablespoon olive oil
 1 small onion, diced
 3 stalks celery, diced
 3 cloves garlic, minced
 2 carrots, shredded
 1 pound cooked, cubed chicken breast
 4 cups chicken broth
 1 (16 ounce) package mini potato gnocchi
 1 (6 ounce) bag baby spinach leaves
 1 tablespoon cornstarch (optional)
 2 tablespoons cold water (optional)
 2 cups half-and-half cream
 salt and ground black pepper to taste

Directions

Heat olive oil in a large pot over medium heat. Cook onion, celery, garlic, and carrots in the hot oil until onion is translucent, about 5 minutes. Stir in cubed chicken and chicken broth; bring to a simmer.
Stir gnocchi into the simmering soup and cook until they begin to float, 3 to 4 minutes. Stir in spinach; cook until wilted, about 3 additional minutes.
Whisk cornstarch into cold water until smooth. Stir cornstarch mixture and half-and-half into simmering soup. Cook until soup thickens slightly, about 5 minutes. Season to taste with salt and black pepper.


To start off, I make this recipe using a Rotisserie chicken. I have never tried it with regular chicken, and while I think it would still be good, I like the added flavor of the rotisserie seasonings. Plus all the meat that comes off of a rotisserie chicken is the perfect amount for soup. Anywho, so pick off all the meat and set aside. Boil the carcass and skin for several hours to make stock. (at this point I usually add some additional chicken bullion to the broth, do this to taste). I then dice 3-4 stalks of celery, 1 onion, and 1 bunch of organic carrots (trust me, I am not on the organic train for the most part, but definitely AM for carrots!), which equals to be about 5-6 smallish carrots. Then follow the recipe as directed. I haven't put spinach in it, because for many years, I've had a phobia of cooked spinach. I recently tried it in the Zuppa Toscana soup, and it was fabulous, so I think I'll start adding spinach to the final product. It is great served with nice crusty bread, and a fresh green salad. Definitely a keeper around this household! I haven't tried freezing it yet (the leftovers are equally awesome and tend to go quickly), but that is my next task. I'll let you know how it goes! 

Sunday, April 14, 2013

Chicken Oscar Bearnaise

There isn't really a recipe for this, per se. I had it at a restaurant one time and did my best to recreate it. It's pretty forgiving, so try it however sounds best to you! It's super easy to throw together, and looks great on a plate - the most excellent of company food. ;)

Chicken Oscar
Time: About 20 minutes

           Ingredients

1 Chicken breast per person
Flour
Salt and Pepper to taste
Olive oil
1/3 can of crab per person (not imitation - it has to be real! I usually used the canned lump crab)
Asparagus - 3-5 stalks per person
Garlic
Garlic Salt
1 package of Bearnaise sauce, made according to the package directions

        Directions

1. Preheat oven to 350 degrees. Pound chicken breasts flat. Cover with flour, salt, and pepper until fully coated.
2. In a shallow baking dish, place the asparagus spears. Drizzle a small amount of olive oil and garlic, shake or stir until all the spears are coated with a light coating of oil. Use Garlic salt and pepper to taste. Put in the oven and roast for 10-15 minutes.
3. Once the asparagus is roasting, heat several tablespoons of olive oil in a frying pan on medium high - once hot, add the chicken and cook for 4-5 minutes on each side, or until brown and fully cooked through.
4. Make Bearnaise sauce according to package directions.
5. To plate: Place 1 chicken breast on a plate. Place 3-5 spears of asparagus on top. Put ~1/3 can of crab meat on top (you don't need to heat it up prior - the heat from everything else takes care of it), and cover with bearnaise sauce to taste.


I looked it up, and it most of the time this is made with veal. I like the chicken option better. :) It's a fun recipe that looks cool, and all the flavors blend together really well. Enjoy!

Sunday, March 17, 2013

Easy Irish Soda Bread

Ummm, yum! That's all I have to say about this bread. I love making bread that doesn't require rising, or very much kneading. This and beer bread are my go-to's!

Easy Irish Soda Bread

Ingredients
Original recipe makes 1 1 1/2 pound loaf

 4 cups all-purpose flour
 4 tablespoons white sugar
 1 teaspoon baking soda
 1 tablespoon baking powder
 1/2 teaspoon salt
 1/2 cup margarine, softened
 1 cup buttermilk
 1 egg
 1/4 cup butter, melted
 1/4 cup buttermilk

Directions

Preheat oven to 375 degrees F (190 degrees C). Lightly grease a large baking sheet.
In a large bowl, mix together flour, sugar, baking soda, baking powder, salt and margarine. Stir in 1 cup of buttermilk and egg. Turn dough out onto a lightly floured surface and knead slightly. Form dough into a round and place on prepared baking sheet. In a small bowl, combine melted butter with 1/4 cup buttermilk; brush loaf with this mixture. Use a sharp knife to cut an 'X' into the top of the loaf.
Bake in preheated oven for 45 to 50 minutes, or until a toothpick inserted into the center of the loaf comes out clean, about 30 to 50 minutes. You may continue to brush the loaf with the butter mixture while it bakes.


This is awesome served with any kind of soup. I usually brush it once or twice while it's baking and that seems to work out just fine. Now go forth, my wee bairns, and cook to your Irish heart's content. :)


While it's not really Irish at all, and English making it all the worse, we are in fact catching up on Merlin this St. Patrick's Day. I'm enjoying it, though I've heard tale that it ends in not a manner that I would wish. I think each of the actors does a great job of capturing the essence of the character, which is a nice improvement over most American shows.

Irish Coddle

Happy St. Patrick's Day! I hope you are enjoying good food and green beer, if that's your thing. :) Irish Coddle is a typical Irish dish, of which there are many variations. This just happens to be mine.

Irish Coddle
Ingredients

6-8 medium potatoes, sliced thin
1 pound bacon (leaner is better), cut into small pieces
1 package Eckrich sausage, cut into bite sized pieces
2 medium onions, diced
1 cube beef bullion
1 cup water, plus more later
salt and pepper to taste

Directions

Saute bacon and onion together until mostly cooked. Add sausages and saute together for several minutes. Then add 1 cup of water and the beef bullion (you can use more if you like a stronger flavor), bring to a boil and simmer for ~5 minutes. In a pot large enough to hold all the ingredients, layer 1/3 of the potatoes in the bottom. Add half of the meat mixture, layer the potatoes, and repeat. Then add water enough to just cover the top layer of potatoes. Bring to a boil, and then lower heat medium low. Cover with a well-fitting lid and simmer for ~ 1 hour, occasionally pressing down the top layer so that the potatoes get cooked. Season to taste. 

I have made this recipe numerous times, and am still playing around with various cooking methods. I've tried it in the crockpot, and while I LOVE crockpotting, this recipe is best made stove top. It may take longer than an hour to cook - it just depends on how thick the potatoes are. Serve with Irish Soda Bread, and you'll have a meal fit for an Irish king. :) 

Wednesday, March 13, 2013

Best Steak Marinade

I love really flavorful steak (well done of course! I've had waiters tell me I'm "ruining" the meat...I'm sorry, I just don't want it mooing on my plate!). Tried this marinade, and was quite pleased with it. Definitely will be making it again!

Best Steak Marinade


Original recipe makes 1 1/3 cups
 1/3 cup soy sauce
 1/2 cup olive oil
 1/3 cup fresh lemon juice
 1/4 cup Worcestershire sauce
 1 1/2 tablespoons garlic powder
 3 tablespoons dried basil
 1 1/2 tablespoons dried parsley flakes
 1 teaspoon ground white pepper
 1/4 teaspoon hot pepper sauce (optional)
 1 teaspoon dried minced garlic (optional)


I think for the first time in a long time, I actually followed this one as directed! I did use fresh minced garlic instead of dried, and forwent the hot pepper sauce. But since both of those were optional, I'm sticking with my original statement! ;)  Wasn't sure about the basil addition, but it turned out the perfect balance. I used some top sirloin steaks and pan seared them until done. It was delicious! Served with loaded mashed potatoes (cheese, chives, and bacon bits), and fresh salad.

Saturday, March 9, 2013

Eggs Benedict Casserole

I love breakfast food. Breakfast for dinner is even better, as I actually get the time to enjoy it! This is a fun overnight casserole, though I think next time I might skip the overnight part in hopes that the bread will be less soggy. I like the option of having Eggs Benedict (which I love) for a larger group without the hassle of making individual eggs. :D

Eggs Benedict Casserole
Ingredients


cooking spray
 8 large eggs
 2 cups milk
 3 green onions, chopped
 1 teaspoon onion powder
 1 teaspoon salt
 3/4 pound Canadian bacon, cut into 1/2-inch dice
 6 English muffins, cut into 1/2-inch dice
 1/2 teaspoon paprika
 1 (.9 ounce) package hollandaise sauce mix
 1 cup milk
 1/4 cup margarine

Directions

Spray 9x13-inch baking dish with cooking spray.
Whisk eggs, 2 cups milk, green onions, onion powder, and salt together in a large bowl until well mixed.
Layer half the Canadian bacon in the prepared baking dish. Spread English muffins over meat and top with remaining Canadian bacon. Pour egg mixture over casserole. Cover baking dish with plastic wrap and refrigerate overnight.
Preheat the oven to 375 degrees F (190 degrees C).
Sprinkle casserole with paprika; cover with aluminum foil.
Bake in preheated oven until eggs are nearly set, about 30 minutes; remove foil. Continue baking until eggs are completely set, about 15 more minutes.
Whisk hollandaise sauce mix with 1 cup milk in a saucepan. Add margarine and bring to a boil, stirring frequently. Reduce heat to medium-low, simmer, and stir until thickened, about 1 minute. Drizzle sauce over casserole to serve.


Other than substituting regular ham for the Canadian Bacon, and not putting in green onions (which despite the fact that I keep leaving them out in recipes, I actually DO like!), follow as directed. I did use Bearnaise sauce instead of Hollandaise...personally, I like Bearnaise better. And I used TWO packages instead of one. I tend to like things saucy, so it was perfect for me, but for most people, one package would probably be fine. The English muffins got a little soggy, so next time I think I would mix everything together and bake it immediately in hopes that the bread would keep it's texture. It wasn't even as bad as leftovers the next couple days!